


Introduction
➤ The characteristics, advantages, and fundamentals of Strapi and Next.js overview were discussed in part 1. A brief tutorial on integrating strapi into your project is also provided.
➤ Now in this blog, we will go into methods to integrate strapi CMS setup with Next.js into a website while still following SEO best practices in this blog. We will also discuss caching approaches and performance optimization measures, as well as how to use Strapi to manage dynamic pages.
➤ By the time you finish reading this blog, you will know exactly how to use Strapi and Next.js to build robust, search engine optimization-friendly websites that function properly provide an excellent user experience, and become professional offshore developers in Next.js with strapi.
Single types in Strapi
➤ In strapi, a content type that represents a single piece of content is referred to as a Single Type. It’s perfect for static material on a website, such as a about us or contact page. Single types handle stand-alone content entities; collection types handle numerous entries of related content.
➤ They provide simple use and effectiveness for organizing specific pages or parts inside the framework of a website. Strapi’s user-friendly interface makes it simple to configure single kinds, enabling users to easily manage content, define fields, and set permissions. This function simplifies the process of managing material, guaranteeing coherence and consistency among the many parts of a website.
Developing a CMS with Strapi and Next.js
➤ Using strapi as a headless CMS for Next.js is a great way to create dynamic websites. The capabilities of Next.js SSR (Server-Side Rendering) for CMS (Content Management System) improve SEO and speed, and Strapi is a headless CMS that is adaptable and extendable. When combined, they offer developers to develop web apps that are quick, engaging, and simple to maintain.
➤ Faster page loads and better SEO are achieved with dynamic website development with Next.js and Strapi and by hire dedicated team, which makes sure that information is displayed on the server before being delivered to the client. Next.js with Strapi integration makes content management simple and straightforward.
➤ Now, we create a collection in strapi known as pages before working with Strapi, make sure you install Strapi first if not you can refer this blog Integrating strapi with Next.js for proper installation.
Step 1: As you see in the attachment below, please navigate to the content type builder on the strapi dashboard to add a new collection.

Step 2: Click on Create New Collection Type as highlighted in the attachment below when you are at the content type builder. You will see the collection type and single type.

Step 3: You will see the attachment screen below after clicking create new collection type. Enter your display name for collection.

Step 4: Fill in the fields with content, slug, and page description as needed. As of now, I have only included three fields: page description, slug, and title.

For detail description of all fields you can refer to our previous blog i.e. “Integrating strapi with next.js: Unleashing the power of headless CMS part-1”.
Step 5: Save the collection it will restart automatically.
Step 6: As you see in the attachment below, please navigate to the content manager on the strapi dashboard to add data in page collection.

Step 7: To add data, click the add new entry button.

Step 8: The screen that appears below is where you add, save, and publish the data. Make sure to publish after saving since if you don’t, it will remain under draft data and not be visible.

Step 9: I have added the below data for reference.

Step 10: As you see in the attachment below, please navigate to the setting on the strapi dashboard to view the collection.

Step 11: Click on roles as highlighted in the attachment below when you are at inside settings.

Step 12: After clicking on Roles you will see two options Authenticated and public, Click public.

Step 13: After Click on Public you will see all collection permission open page collection dropdown as highlighted in the attachment below when you are under the public section.

Step 14: Set the permission of find and find one by clicking on it after clicking on permission save it.
Step 15: As you see in the attachment below, At save you can also view API Endpoint for integration.
➤ We are done with the setup for strapi CMS data.
Now we are going to integrate the above strapi CMS in the Next.js for creating dynamic pages with Next.js and Strapi.
Step 1: Execute the below command to install strapi.
- npx create-next-app myproject
Step 2: To run the Next.js project execute the following command.
- npm run dev
Step 3: Add the following code inside pages/[slug].js to dynamically called the Pages and show data based on that page.
export async function getServerSideProps({ params }) { const { slug } = params; const res = await fetch(`http://localhost:1337/api/pages? populate=*&filters[slug]=${slug}`); const result = await res.json(); return { props: { data: result.data[0] } }; } export default function Page({ data }) { return ( <div> <h1>{data.attributes.page_title}</h1> <div dangerouslySetInnerHTML={{ __html: data.attributes.page_description[0].children[0].text}} /> </div> ); }Developing a CMS with Strapi authenticated and Next.js
➤ We previously looked at the strapi cms data using public route; however, due to security concerns, this is not a secure alternative. Consequently, we are going to explore how to use authenticated method for developing dynamic websites with Next.js and Strapi.
➤ We will take into consideration the same collection that we use on page.
➤ Regarding strapi modifications
Step 1: Go into roles->public, revoke the public permission, and save it.
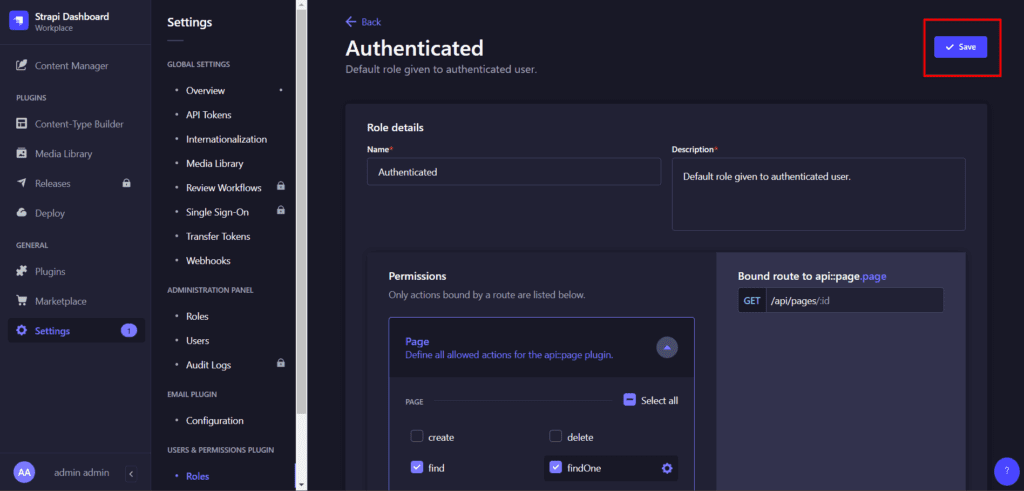
Step 2: As you see in the attachment below, please navigate to Roles on the strapi dashboard to add a permission for authenticated route click authenticated.

Step 3: As you see in the attachment below, Set the permission of find and find one of page by clicking on it after click on permission save it.

Step 4: We need to set an API token in order to authenticate our collection.
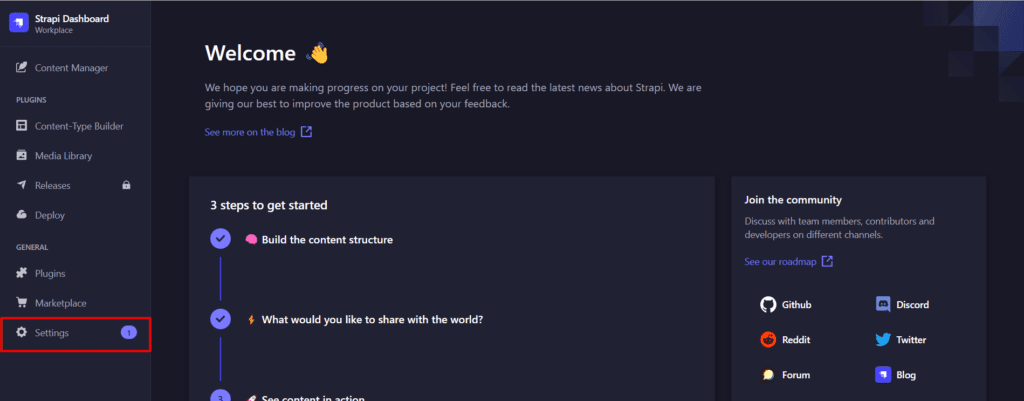
Step 5: To add an API token, please navigate to the settings on the strapi dashboard, as shown in the attachment below.
Step 6: When you are in the settings, click on the API token, as indicated in the attachment below.

Step 7: Create a new API token with full access or custom in the selected collection you like to display, as you can see in the attached image. At the moment, I have selected full access for a period of seven days.

Step 8: After saving, the API token will only be shown once; therefore, copy it.
- We are done with the setup for strapi CMS authenticated data.
- Now we are going to integrate the above strapi CMS in the Next.js.
Step 1: Add the Next.js project’s.env file at the root, then add the code that we copied from the API token as shown below.
- NEXT_PUBLIC_API_token= Bearer [Your_strapi_token]
Step 2: Add the following code inside pages/[slug].js to dynamically called the pages and show data based on that page with strapi authenticated.
export async function getServerSideProps({ params }) { const { slug } = params; const res = await fetch(`http://localhost:1337/api/pages?populate=*&filters[slug]=${slug}`,{ headers:{ 'Authorization' : process.env.NEXT_PUBLIC_API_token } }); const result = await res.json(); return { props: { data: result.data[0] } };}Export default function Page({ data }) {return ( <div> <h1>{data.attributes.page_title}</h1> <div dangerouslySetInnerHTML={{ __html: data.attributes.page_description[0].children[0].text}} /> </div>);}Implementing SEO best practices
➤ It is necessary to implementing SEO best practices with Next.js and strapi with careful planning for maximum search engine visibility and ranking. Start by focusing on generating excellent, appropriate content that connects to the interests and search intent of your target audience. Make use of Next.js’s dynamic rendering features to write search engine-friendly HTML content. This will help search engine crawlers better index and understand your sites.
➤ The flexible content management system offered by Strapi might be used to efficiently manage and update your content, including metadata such as headings, descriptions, and titles. Make sure that the image alt tags are accessible and search engine optimized, and avoid stuffing your content with pointless keywords.
➤ To provide search engines with additional context about your content and raise the likelihood that rich snippets will appear in search results, use JSON-LD structured data markup. Prioritize mobile friendliness and site speed by using Next.js’s performance optimization tools and Strapi’s flexible API endpoints to build fast-loading websites.
➤ Make regular use of tools like Google Analytics and Search Console to monitor and analyze the performance of your website. Adapt your SEO strategy as needed to increase organic traffic and ranks. You can optimize SEO best practices and expand the visibility and reach of your website by integrating Next.js and Strapi.
Performance optimization
➤ For performance optimization for CMS websites especially those created with Next.js and Strapi performance optimization is essential to guaranteeing quick loads, seamless user interfaces, and top search engine rankings. There are various strategies that can be used to improve these websites’ functionality.
➤ Caching techniques are essential for lowering server load and accelerating the delivery of material. By providing users with pre-generated information, caching at different levels—server-side using tools like Redis, and client-side with resource workers—can significantly increase speed.
➤ To minimize network requests and file sizes, CSS and JavaScript files must be minified and bundled. By ensuring that only the essential code is transferred, load speeds can be improved by utilizing tools like Webpack or Next.js built-in optimizations.
➤ Furthermore, optimizing the performance of Next.js and Strapi websites depends heavily on database query optimization. Strapi offers query optimization features, such as population, that make it possible to retrieve related data quickly. Server response times can be greatly decreased by optimizing queries and indexing databases properly and we as an August Infotech an offshore development company provide software development service experts in this area.
Caching strategies
➤ Efficient caching strategies for Next.js and Strapi CMS integration must be used in order to maximize performance and minimize server load. By reducing the need for repeated queries to the server, caching helps to store and provide frequently accessed data, improving the user experience in general.
➤ Client-side caching is one frequent caching technique. Client-side caching with Next.js can be performed by utilizing browser caching capabilities or caching API responds in memory. Performance can be enhanced by promptly serving following requests without overloading the server by keeping frequently used data on the client-side.
➤ Server-side caching is another useful tactic. Several caching systems, including Redis, are supported by Strapi CMS. Significant performance gains can be achieved by serving consecutive requests for the same data without recalculating them by caching database queries or API replies at the server level.
➤ The combination of Next.js and Strapi CMS additionally benefits from Content Delivery Network (CDN) caching. Content can be served to users from the closest edge server, lowering latency and speeding up load times, by caching static assets and content at CDN edge locations.
➤ The biggest performance gains can be obtained by implementing a hybrid caching strategy that combines client-side, server-side, and CDN caching. By ensuring that data is cached at several tiers of the application stack, this method maximizes scalability and efficiency.
Conclusion
➤ Combining Next.js and Strapi together is a powerful combination for dynamic web development. The server-side rendering and dynamic routing features of Next.js are provided to the frontend framework, and Strapi functions as a powerful headless CMS that makes content management and API development easier. When combined, they simplify the development process and make it possible to create dynamic, data-driven online applications quickly. Developers can achieve scalability, flexibility, and maintainability in their projects by utilizing the advantages of both platforms. Next.js development with Strapi promises to be a successful option, enabling developers to create amazing digital experiences, whether they are developing blogs, e-commerce sites, or complicated online apps.