How to integrate Identity Management System with WordPress?
We have opted for Okta, the Identity Cloud, to provide secure identity management with Single Sign-On, Multi-factor Authentication. We learned about SSO, SAML, Okta in the first blog, please read to understand it in detail. Next, we will be addressing How to integrate it with the WordPress ecosystem?
Why integrate Identity Management Systems?
Identity Management Systems (IdM) supports the organization to provide centralized identity, smart security, and a provision to improve the efficiency of existing tools, processes, and identify opportunities to reduce costs associated with maintaining identities and meeting the objective of the ever-evolving digital world. How to integrate with WordPress? That was the ask.
Identity Management System – Okta Single Sign-On integration with WordPress
Fret not; we will provide a walk-through of how we integrated Okta SSO with WordPress.
Let us first clear the air; WordPress out of the box does not support Okta SSO.
Why reinvent the wheel when we can leverage the community that WordPress comes with, we plugged ourself to use the best plugin from the sea of WordPress plugins, and we opted for miniOrange WordPress “SAML SP Single Sign On – SSO login” plugin.
Plugin brief:
- This SAML WordPress SSO solution provides SAML SSO capability to the WordPress site, converting it to a SAML compliant Service Provider.
- The plugin acts as a SAML 2.0 Service Provider
- It is easy to configure to establish the trust between the plugin and a SAML 2.0 capable Identity Provider to authenticate the user to the WordPress site securely.
- It allows SSO login with Okta, Azure AD, Azure AD B2C, Keycloak, ADFS, Shibboleth, Salesforce, Google Apps, SimpleSAMLphp, OpenAM, Centrify, Ping, RSA, IBM, Oracle, OneLogin, Bitium, WSO2, NetIQ and all SAML 2.0 capable Identity Providers.
How did we integrate it?
- Steps to generate the Metadata XML file from Identity Management System – Okta Application for WordPress Okta integration.
- Within the miniOrange SAML SP SSO plugin, navigate to Service Provider Metadata tab.
- Find the SP metadata such as SP Entity ID and ACS (AssertionConsumerService) URL required to configure the Identity Provider.

- Log into Okta Admin Console. Select “Classic UI” and then Application.

- Click on Add Applications.

- Click on Create New App.
- Click on the SAML 2.0.

- Within the General Settings, enter App Name and click on Next.
- In SAML Settings, enter the following:
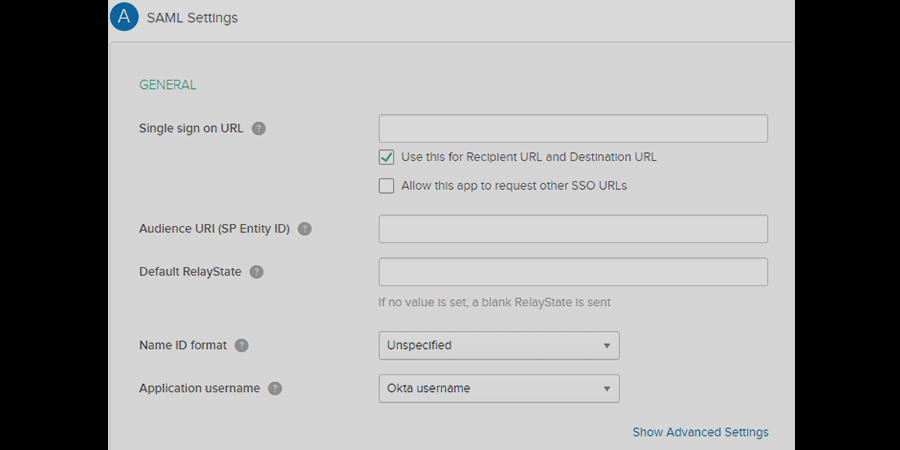
| Single Sign On URL | Enter ACS (AssertionConsumerService) URL from the Identity Provider tab of the module. |
| Audience URI (SP Entity ID) | Enter SP Entity ID / Issuer from the Identity Provider tab of the module. |
| Default Relay State | Enter Relay State from the Identity Provider tab of the module. |
| Name ID Format | Select E-Mail Address as a Name Id from dropdown list. |
| Application Username | Okta username. |
- Configure Attribute Statements and Group Attribute Statement (Optional).
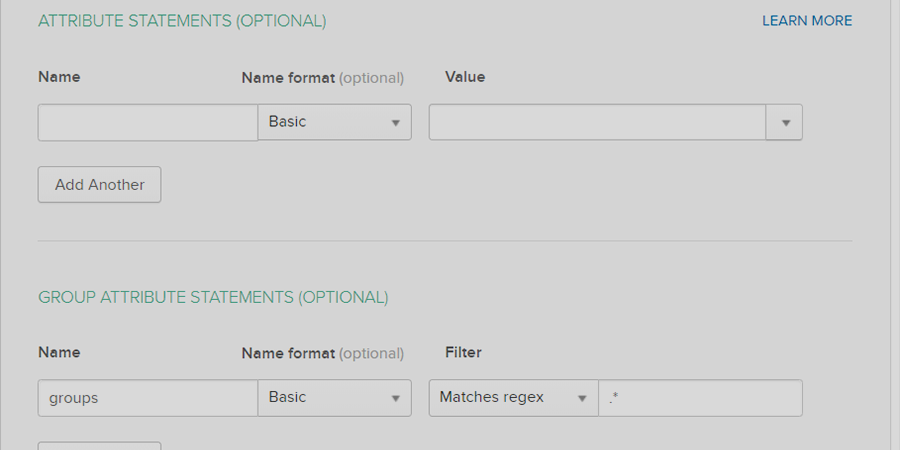
- The Active Directory already integrated with Okta, and the only ask is to map the AD groups.
- An important point to take care of here is to add the OUs used to import groups.
- Furthermore, the next must is to map the memberOf attribute under the integrated directory’s configuration.
- Assigning Groups/People
- After creating and configuring the app go to the Assignment Tab in Okta.
- The following step is to assign access to the people/groups to log in through this app.
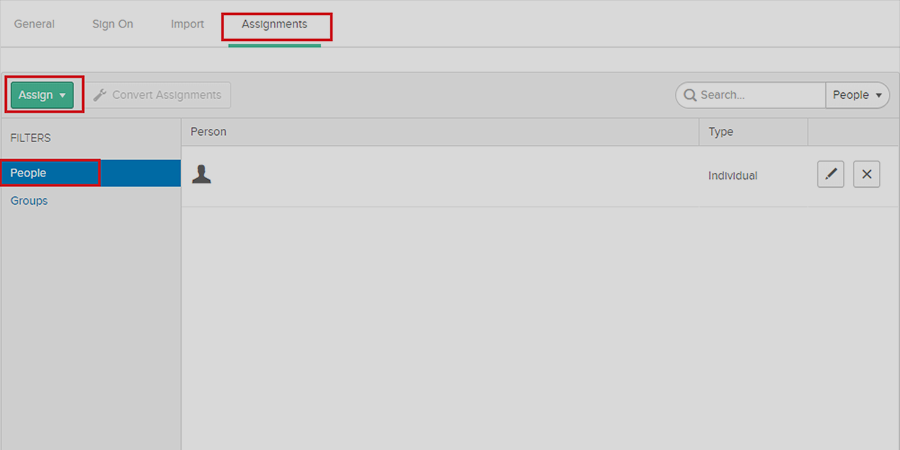
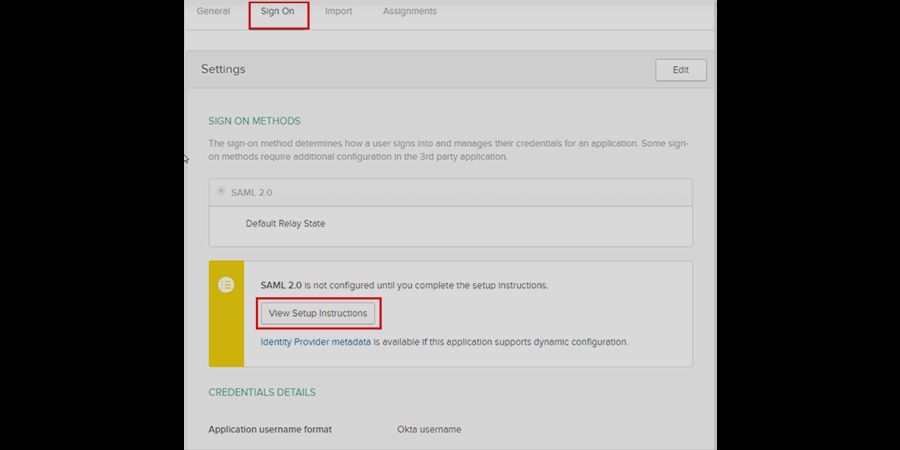
- The next step to the access assignment is to pull the Sign On tab.
- Click on View Setup Instructions to get the SAML Login URL (Single Sign-on URL), Single Logout URL, IDP Entity ID, and X.509 Certificate. It is required to configure the Service Provider.
- Install miniOrange “SAML SP Single Sign On – SSO login” WordPress plugin
- Configuring WordPress as Okta SSO
- Click on the Upload IDP metadata button.
- Enter the Identity Provider Name
- Either upload a metadata file and click on Upload button or use a metadata URL and click on Fetch Metadata

- Provide the required settings (i.e., Identity Provider Name, IdP Entity ID or Issuer, SAML Login URL, X.509 Certificate) as provided by your Identity Provider and click on the Save button.
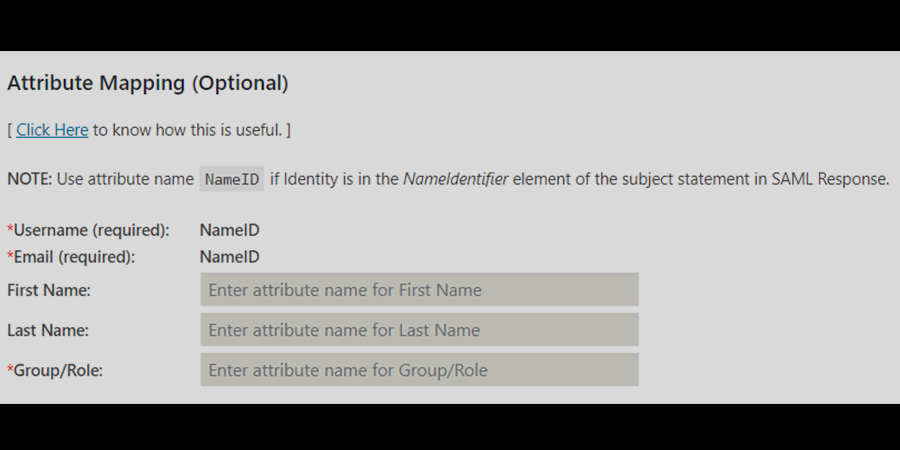
- Attribute Mapping
- Username
- Role Mapping
- Set a default role to assign to all the non-admin users when they perform SSO.
- Go to the Attribute/Role mapping tab and navigate to the Role Mapping section.
- Select the Default Role and click on the Save button.
- Set a default role to assign to all the non-admin users when they perform SSO.

-
- SSO settings
- To add a login widget to enable SP-Initiated SSO to the site.
- Navigate to Redirection and SSO links tab and follow the given steps under Option 1: Use a Widget to add a login widget to the site.
- To add a login widget to enable SP-Initiated SSO to the site.
- SSO settings

Do you have a requirement to integrate Identity Management System – Okta, with either WordPress or any other environment, feel free to reach us? We will be happy to provide you a customized approach to your ask.
